Some notes on how I’ve been processing recent mars images.
Firstly – garbage in garbage out. If the video captured is not high quality no amount of wavelet processing magic can fix it. Check the weather, the jet stream, collimation and focussing.
All my images are with the C9.25, televue 2.5x powermate, antares filters and ASI 120mm camera. Using the 5x powermate just gives a blob that I can’t pick out details on.
Autostakert
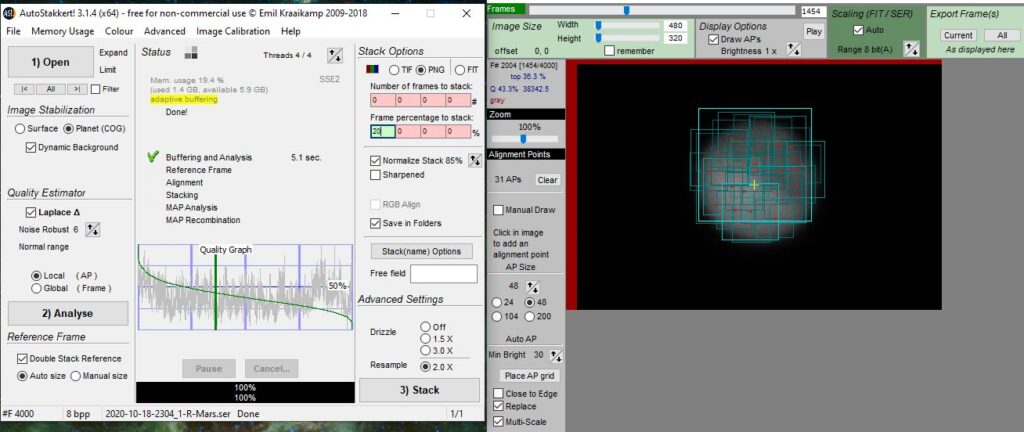
These are the settings for AS3. I do the resample here as it’s easy. The other option, that may work better if there are artifacts in the wavelet processing in registax is to resize after the registax processing and before winjupos.
Registax
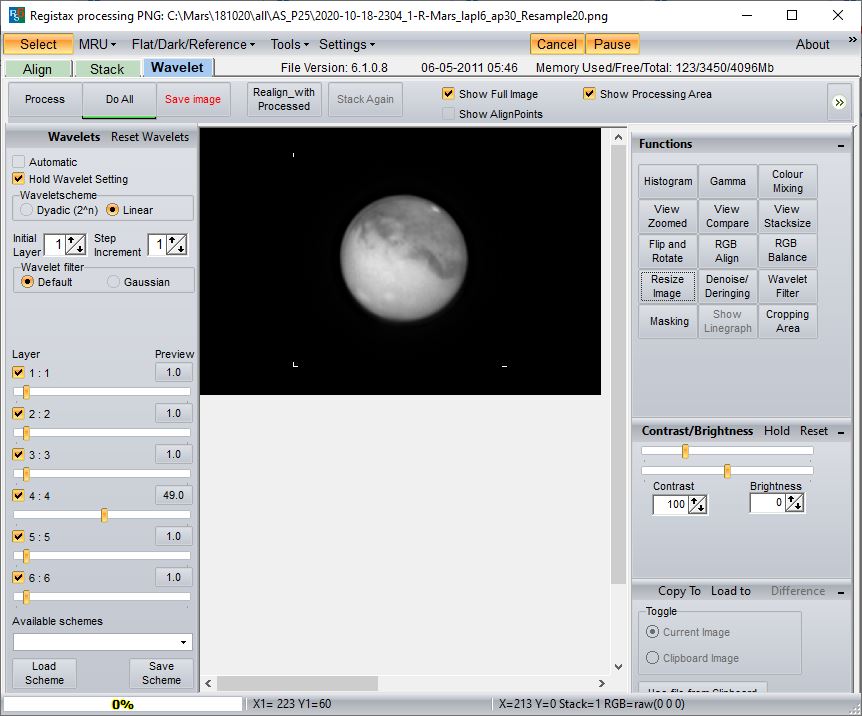
In registax the simplest way to do wavelets is to do the default filter with a step increment of 1. If the image is resized then move layer 4 to about 50. If the image is not resized then layer 2 will be best.
Winjupos
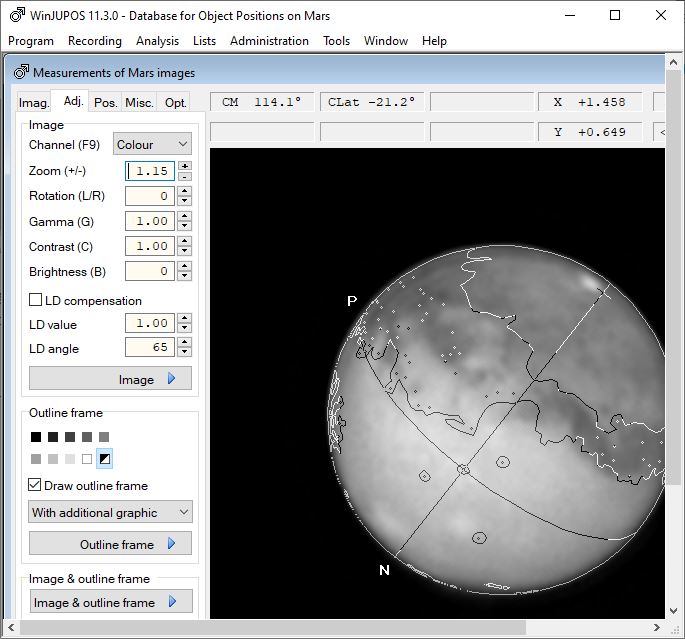
First off open each processed image and go to recording -> image measurement. Add the additional graphic overlay and match it up. Antother help here can be if you have an image showing the moons – wj will indicate where they are which can assist getting the alignment right.
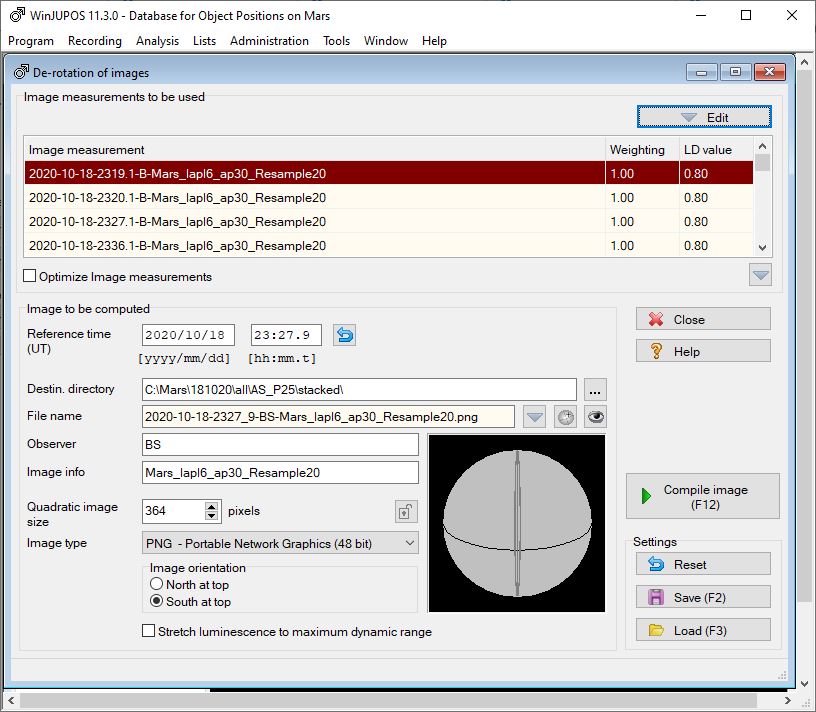
Next do the derotation for the filtered images. Set the LD value to 0.8 here and compile and save the images for each filter.
Lastly we combine the filtered images
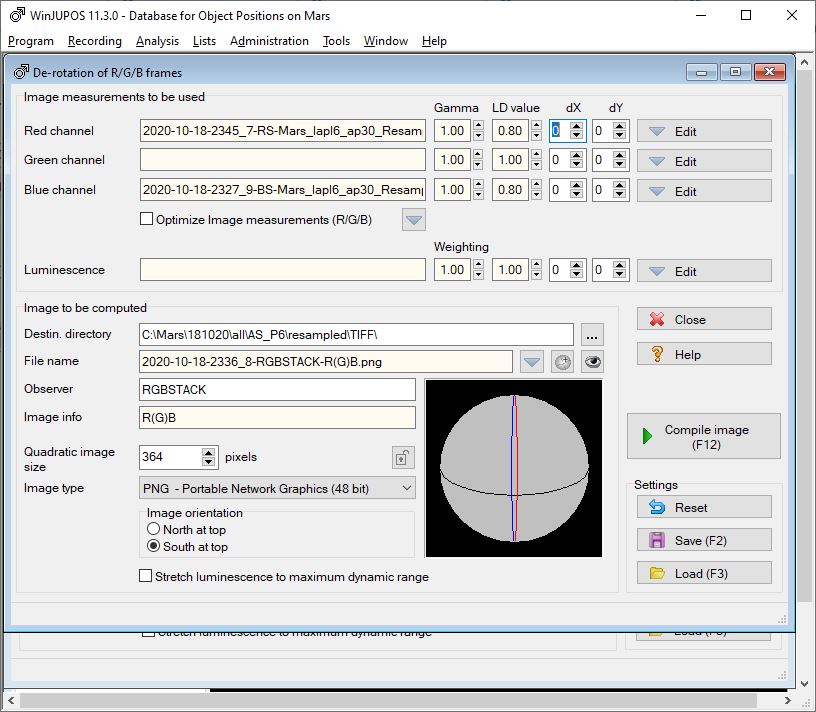
LD value to 0.8. If there is no green then winjupos will create a synthetic one.
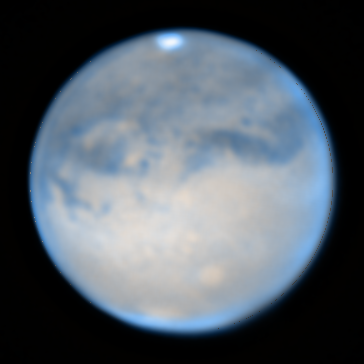
That’s pretty much it. After that it’s in to photoshop and tidy up any colours or artifacts. Fix any bad pixels from the rotation, make the polar caps white not blue etc. You can also reopen it in registax to do basic colour balance etc.