From time to time the International Space station transmits Slow Scan TV (SSTV) images as it passes overhead. These are relatively simple to receive and decode and sometimes you can get a downloadable certificate for decoding them.

This tutorial will go through the simplest way to decode the SSTV images. There are more streamlined ways, and ways with much better antenna designs etc. but this is intended to get you started.
The Radio
If you have a scanner or handheld radio you can use that. If you don’t I’d suggest investing the princely sum of about €20 on a RTL SDR
Handheld / Scanner
You’ll need a radio to get the audio from the ISS. The radio needs to be able to receive wideband FM on 145.800MHz. Your typical FM radio won’t do this but a scanner or handheld ham radio probably will.
Tue to that frequency during the pass and record the audio on a dictaphone or mobile phone.
SDR
I use the FunCube Dongle Pro+ for these projects. It’s for listening to satellites but costs about €150.
A beginner approach would be to use an RTL-SDR (https://www.rtl-sdr.com/) you can pick these up on ebay etc for around €20. We’ll be using one of these for the tutorial.
The Antenna
The best beginner antenna is the one you already have. If your handheld/scanner/RTL came with an antenna place it as high as you can, vertically, with a clear view of the sky and away from other electronics that might cause interference.
There are no shortage of designs for antennas for this type of project online and several are available commercially. But for a first go, try with what you have and then you can look at upgrading.
I’ve had good success with both my commercial 2m amateur colinear roof antenna and a home made QFH antenna (https://www.instructables.com/id/NOAA-Satellite-Signals-with-a-PVC-QFH-Antenna-and-/).
Finding a pass
The ISS only occasionally transmits SSTV so you’ll need to keep an eye on https://www.ariss.org/ for details when that happens. An alternative project if the ISS is not transmitting is to try and decode NOAA weather satellite images which is very similar in concept but uses slightdifferent software – but has the advantage that there will be a NOAA satellite passing over you every couple of hours at least.
If the ISS is transmitting SSTV you can find the details of the pass times on https://www.heavens-above.com/. Enter your location and it will give you the times and a map of where the ISS will pass. Be sure to click ‘all passes’, by default it will only show nighttime passes.
The optimal passes with a fixed vertical antenna will be when the ISS doesn’t get much higher than 45 degrees elevation. But you should be able to use any pass.
Receiving software for use with RTLSDR
Download the Windows SDR Software Package from https://airspy.com/download/ and install it. for the RTL SDR pay attention to the special instructions and script that needs to be ran.
With the SDR attached and selected you should be able to tune to say 100MHz and pick up a local FM radio station to check that all is working.
For the ISS you want to set it to these settings:
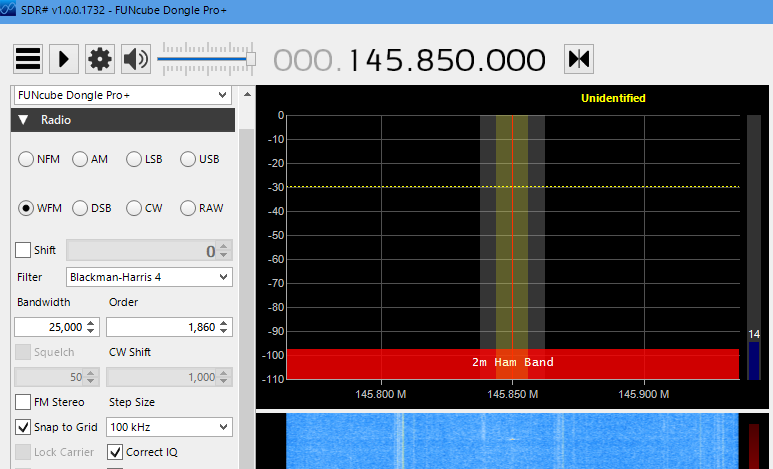
This is with the funcube dongle but the RTL display will be very similar. You want to pick the center of the range to be say 145.800MHz eventhough the signal we want to hear will be on 145.800MHz. This is because there can be some noise at the center point which can cause interference.
As the time of the ISS signal approaches you should record the whole passband:
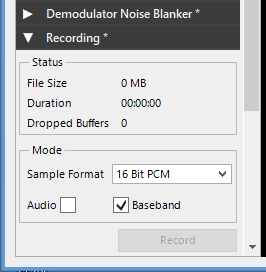
This will allow us more flexibility in the next step to select the audio we want.
Extracting the Audio
Load the file we saved previously into SDR# using the “IQ File (*.wav)” Source option.
Set the frequency to 145.800 and the other settings as above. This time save the audio instead of baseband in the recording. Hit play then record.
Here’s an example IO file for you to try with https://www.dropbox.com/s/jz87whrqd326550/06-54-00_145850000Hz.wav
The SSTV signal should appear as below. Don’t worry that it’s not exactly on 145.800MHz. This is due to the doppler shift – the ISS is moving rapidly towards us and this causes the frequency to be higher than we’d expect. As it moves away it will be lower than 145.800MHz. However our bandwidth is wide enough that we don’t need to take this into account.
You’ll end up with a filename like SDRSharp_20200102_145644Z_145850000Hz_AF.wav
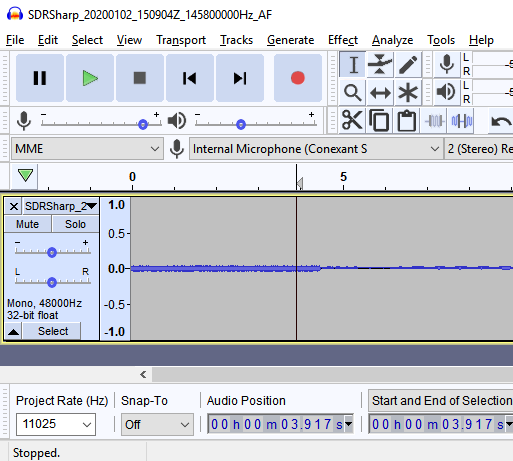
Now this still isn’t in the right format for our decoding software so download and open audacity https://www.audacityteam.org/
Open the file we just recorded and ensure it set to mono and change the rate to 11005 then export it as a wav file. The screen should look something like this:
Here’s an example wav file at the end of this process. We’ll need to rename that from *.wav to *.mmv for the next step.
https://www.cademuir.eu/blog/wp-content/uploads/SDRSharp_20200102_151438Z_145800000Hz_AF.wav
Decoding software
Download MMSSTV https://hamsoft.ca/pages/mmsstv.php
It’s old but it works on Windows 10.
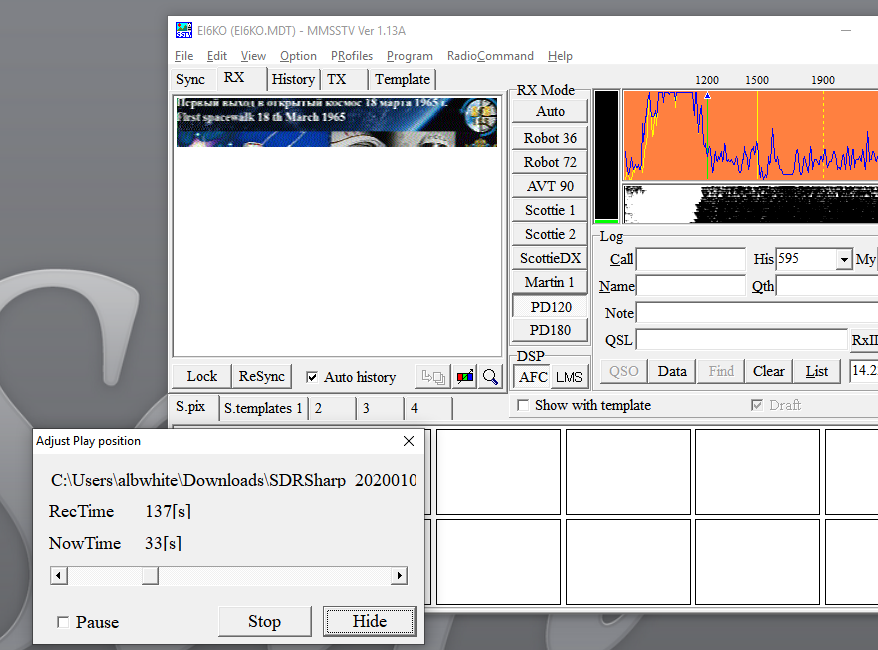
Open MMSSTV, and select Auto inthe RX mode. Load your audio (the renamed .mmv) file (File -> Play sound from the file) and it will start to decode!
Improvements
This process is pretty manual and involves a few steps. However the process and the equipment can be improved greatly.
Here’s some suggestions:
- Use an SDR (RTLSDR, FunCube Dongle Pro+, Airpspy etc.) instead of a handheld or scanner.
- Make a better antenna. This will probably give the greatest improvement. Look at Y antennas (e.g. https://www.rtl-sdr.com/simple-noaameteor-weather-satellite-antenna-137-mhz-v-dipole/ ) , QFH antennas (e.g. https://www.instructables.com/id/NOAA-Satellite-Signals-with-a-PVC-QFH-Antenna-and-/ ) or double cross dipole antennas (e.g. https://www.youtube.com/watch?v=6z3VH4vbiSA)
- Get the antenna higher and use low loss coaxial cable. long lengths of coax, partiularly thin/cheap coax will result in a lot of loss in your signal. Keep lengths short and use good quality. I use RG213 for all my VHF projects.
- Get scheduling plugins for SDR# so that you dont have to get up to record night passes! https://www.rtl-sdr.com/sdrsharp-plugins/ Baseband recorder will let you schedule recordings.
- Use a virtual audio cable. https://www.vb-audio.com/Cable/ This give you, as the name impies, virtual audio devices. So you can set the output from SDR# to go to your virtual audio cable and set the input for MMSSTV to go to the output of your virtual audio cable. This saves on all that messing with audacity to get the right wav format.
- Use an low noise amplifier near the antenna to boost the signal.
- Use gpredict and plugins for SDR# to automatically select satellites as they pass over and correct for the doppler shift.