I’ve recently tried taking some long exposure images just to see how the observatory handles the light pollution. To make life easier I’m using an Astronomik CLS-CCD filter with the DSLR. The one I currently have is for a t-ring, though since these images have worked out well I think I’ll get the clip in version to experiment with regular lenses.
On to a couple of photos! First here’s the Horsehead Nebula in Orion:
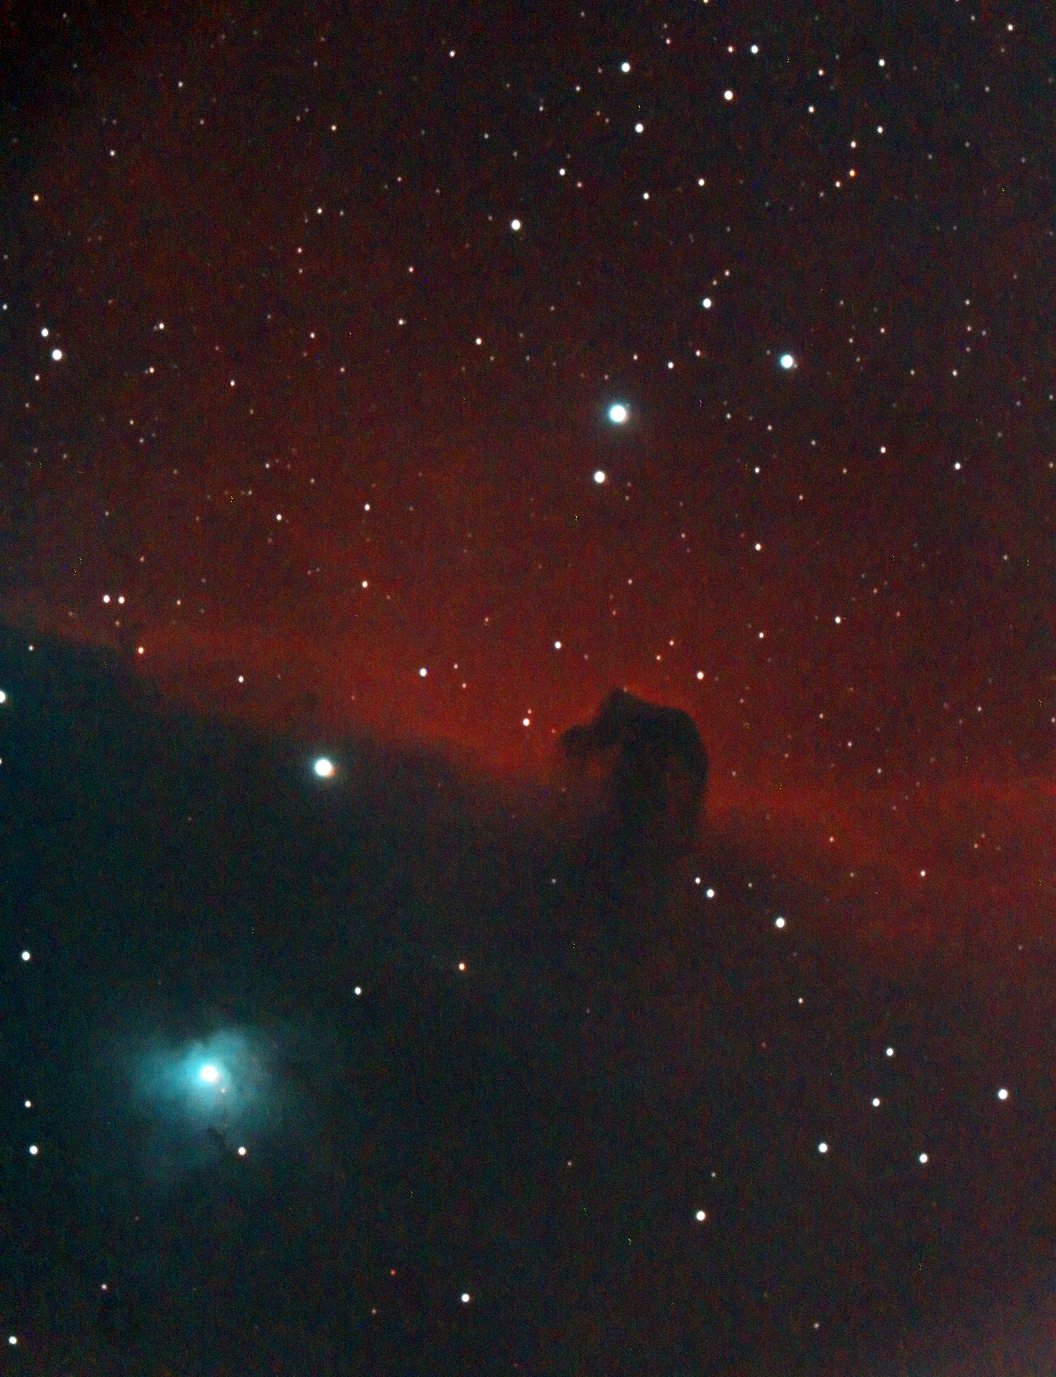 I’ve been fascinated with this nebula since I was a kid so I’m happy to have finally imaged it. My next goal is to see it visually but that will take a big scope and a very dark site! Taken with the Canon 1000D (modified) @ 1600ISO, with the C9.25 at f6.3. This image is composed of 3×10 minutes exposures and similar dark frames, flat frames were also used. The image was processed in Deep Sky Stacker and finetuned using photoshop and noise ninja; though DSS did most of the work. Firstly it’s clear that we did a goo job of getting the red Hydrogen alpha light from the nebula, the modded DSLR helped there. Also the stars are not elongated or warped at the edges, and this is the full frame of the DSLR, so the f6.3 corrector is nod adding any aberrations to the image. The biggest problem with it is the noise. The remedy for that is to get more data and therefore lower the signal to noise ratio. Cooling the DSLR will also help, and I hope to get to that in the coming weeks, these three images were at 12C according to Backyard EOS.
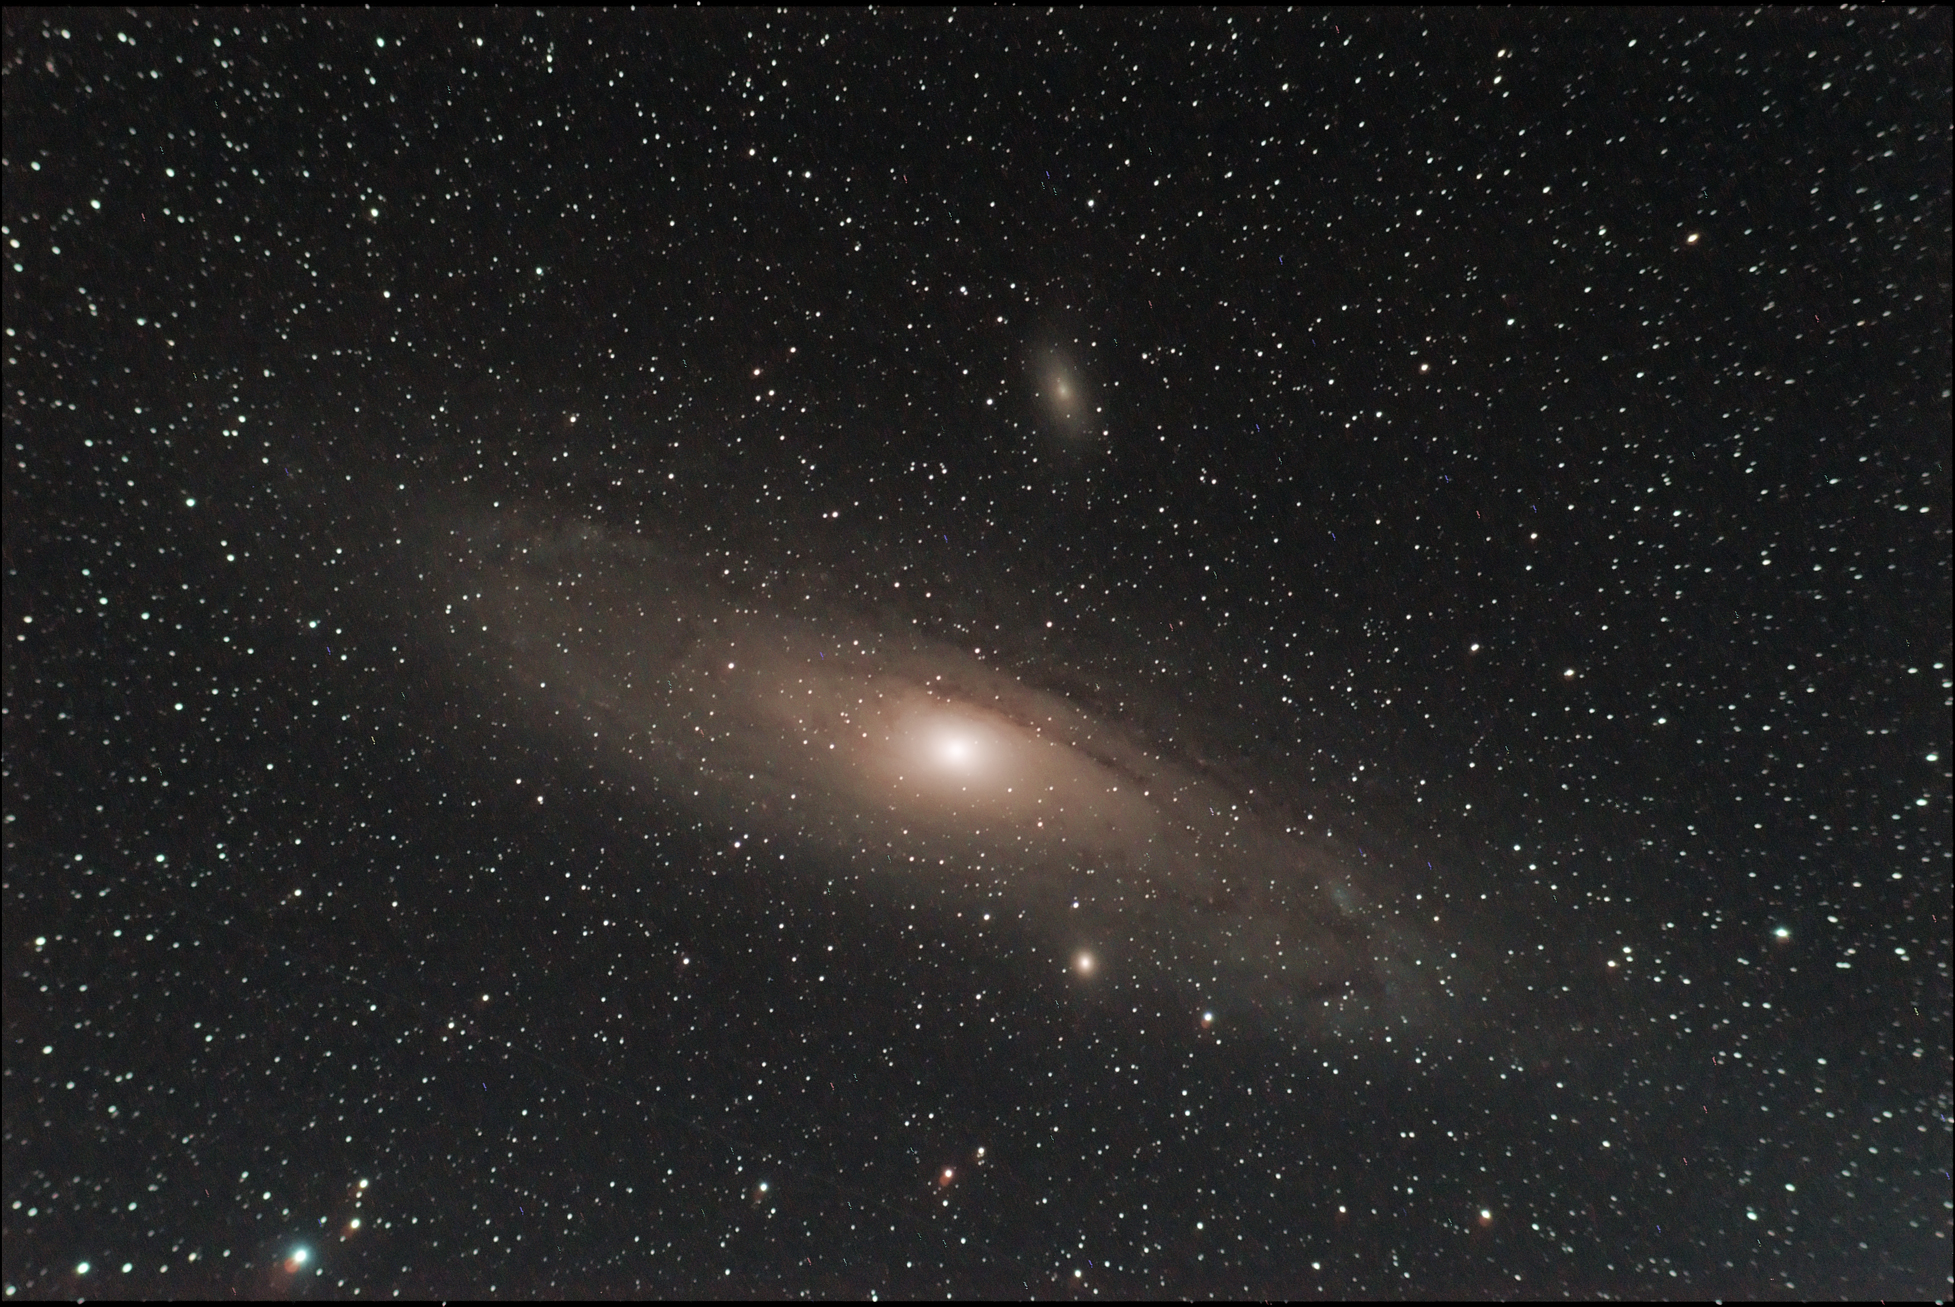 The Andromeda Galaxy. This was taken with an Orion Short Tube80 scope with a focal length of 300mm and the same DSLR. Exposure this time was 6×5 Minutes using 800ISO. The lower ISO helps reduce the noise but I’m also not pushing the processing to bring out faint structures so the noise is less obvious. This is a much wider field of view using the 300mm scope (the Horsehead by comparison was at about 1400mm). However this is a fairly cheap 80mm scope costing around a hundred euro. The difference between that and a scope that costs 10 times as much is visible around the edges. If you enlarge the image you will see that the stars further out are slightly elongated towards the center, also the brighter stars at the edges have their colours spit a little. If you spend money on a good apochromatic refractor you won’t have those problems as the light, of all colours, will precisely hit the focal plane. Still I don’t use the scope for imagining, it’s really just there as a guide scope so no reason to invest in an apo just yet. This scope cost me about €100 a comparible top end refractor from Takahashi would cost over €3000!
I’ll post more images in the near future, but I think those show off what is easily achievable and some if the issues in improving them.